TIE DOWN ENGINEERING
Installation Instructions
for Replacement
Brake Shoes
Instruction sheet part # 15368 Revised 06/10/2003
Installation Instructions
for Tie Down Brand
E-Coat or GalvX Coated Drum Brakes


Each kit contains right side and left side primary and secondary brake shoes, replacement primary springs, replacement bearing
grease caps and locking tab washer (disregard locking tab washer if your spindle/hub may uses a flat washer and cotter key).
IMPORTANT: Read all the pages of these instructions before starting work on the brakes. Make sure you understand the
instructions and have the proper tools, equipment and area to complete the job.
IMPORTANT: Never install new brakes on only one wheel. Uneven braking can occur that will create a dangerous situation.
These instruction pages cover the installation of new brake shoes on TIE DOWN ENGINEERING brand brake systems on
marine and utility trailers. A qualified and experienced mechanic should perform this work.
Safety Issues: The trailer or boat trailer combination are very heavy. Failure to properly secure or support the weight could result in
serious injury or death. Make certain all lifting and supporting equipment has sufficient capacity and is used properly. Follow all
manufacturers precautions regarding brake fluid and all petroleum or solvent-based products. Always wear safety glasses. If you are
unfamiliar with safe operation of any equipment or you are not certain that you are safe, do not proceed! Left is drivers side, right is
passenger side.

Materials required: One brake shoe kit per axle. Each kit contains primary and secondary brake shoes, replacement primary
springs, replacement bearing grease caps and spindle nut locking tab washers (disregard locking tab washer if your spindle/hub
may uses a flat washer and cotter key). Normal shop supplies include rags, cleaning solvents, marine grade grease and a trash container.
Tools required: A well equipped mechanics tool set plus the following tools for simplified and quicker replacement:
1/2" impact wrench Three jack stands
13/16" impact socket Brake Spring Pliers
Hydraulic floor jack Brake hold down spring remover
Spoon-type brake adjusting tool Spray type brake cleaner
Safety goggles Protective dust mask
1-1/2" Socket
Position the trailer on a stable and LEVEL working surface. If possible, leave the tow vehicle hooked to the trailer in order to limit
movement as well as keeping the front end supported and level. If the trailer is not supported on the tow vehicle, it MUST be
blocked directly to the ground at the frame/tongue junction.
UNDER NO CIRCUMSTANCES IS THE TRAILER TO BE SUPPORTED BY THE TONGUE JACK WHILE BEING RAISED AT THE
WHEELS! Block the wheels opposite the side being worked on both front and rear so that the trailer cannot roll. Do one brake at a
time, so the other brake can be used as a guide.
1. Using an adequate capacity floor or scissors jack, raise the side of the trailer. NOTE: Check under frames for brake lines BEFORE
lifting. DO NOT position jack in areas that may damage brake lines, etc.
2. A. Tandem and tri-axle trailers should be jacked on the frame between the wheels, or directly under the axle within 8” of the
backside of the tire. B. Single axle trailers can be lifted on the frame just behind the axle or directly under the axle within 8” of the
backside of the tire (if lifting at the axle).
 CAUTION- always support the trailer with adequate capacity support stands.
DO NOT rely on the jack as the only means of support.
3. Remove the tire and wheel from the hub to be serviced using a 13/16’ socket.
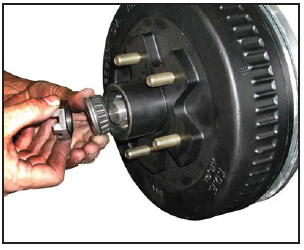
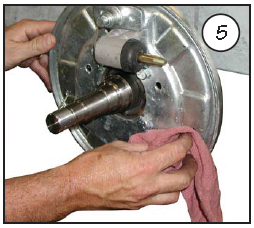
4. Remove the hub dust cap by gently tapping it to the side as the brake drum
is rotated by hand (walk it off). Using a rag, remove excess grease to expose
the castle nut and retainer. Bend open the retainer tab on the locking tab washer,
or remove the cotter pin (depending on how the trailer is equipped). Loosen
the castle nut and gently remove drum by pulling and rotating. NOTE: The outer
(front) tapered roller bearing and thrust washer should be held in place so that
they do not fall on the ground and become
contaminated. It may be necessary on older trailers to remove the rear most
rubber plug from the rear of the backing plate and back off the star adjuster
wheel. This will be necessary if the hub and drum will not come off easily.
5. Inspect the drum for scoring. Resurface or replace the drum if necessary. Before cleaning and disassembly, it is important
to inspect for seal leaks. Look for signs of leakage around the axle seal, wheel seal and wheel cylinder. If leakage is present,
replacement or repair of the components is necessary before replacing your brake shoes. After inspecting, clean the backing
plate areas and old shoes with a spray brake cleaner. This will remove the pad dust and fibers from the brake assembly.
Replace parts as necessary.
Brake Shoe Replacement
(Removal)
Note: Be certain there is no force pushing on the actuator (ball/hitch) such as the tow vehicle being parked on a slight grade, etc.
Even slight pressure in the hydraulic lines could cause the wheel cylinder pistons to be forced out when the shoes are disassembled.
If this occurs the brake system must be bled and purged of air.

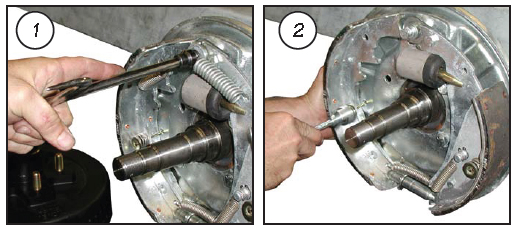
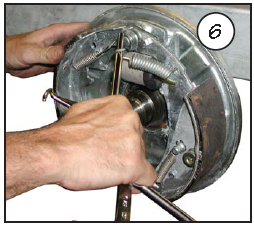
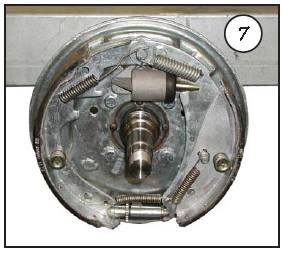
(Reassembly)

 1. We suggest you replace the springs (included)
whenever doing a brake job, as springs lose their
tension from use and brake heat build up.
Disassemble, clean and lubricate the brake adjuster.
2. Install the primary (forward) shoe assembly (left
hand and right hand are different, shoes should be
marked RH and LH). Holding the shoe in a horizontal
attitude, place the travel limiting link (attached to
the primary shoe assembly) around the anchor pin
(12 0-clock). Pivot the shoe downward being careful
to engage the wheel cylinder push rod. Install the
keeper pin, retaining spring and washers.
Note: It may be necessary to temporarily remove the free backing return spring.
3. Install the spanner spring at the bottom of the primary shoe. Rotate the star adjuster by hand until all
the way closed. Make certain it turns freely. Hold the secondary (rear) shoe and install the other end of the
spanner spring at its base. Pivot the top of the secondary shoe toward the front of the trailer and install
the star adjuster making certain the star wheel is toward the rear of the trailer.
4. Pivot the secondary shoe to its normal operating position and seat the upper end against the anchor
pin (12 0-clock). Install the keeper pin, retaining spring and washers.
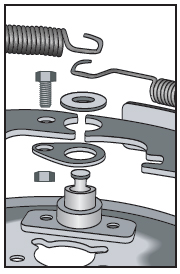
5. Place the flat washer over the anchor pin and install the secondary return spring with the installation tool.


